Create a DLP policy from a template
To create a DLP policy from a template, use the following procedure:
- Open the Microsoft 365 admin center and sign in using your global admin account.
- In the navigation pane, select Show all, expand Admin centers, and then select Compliance, as displayed in Figure 4-47.
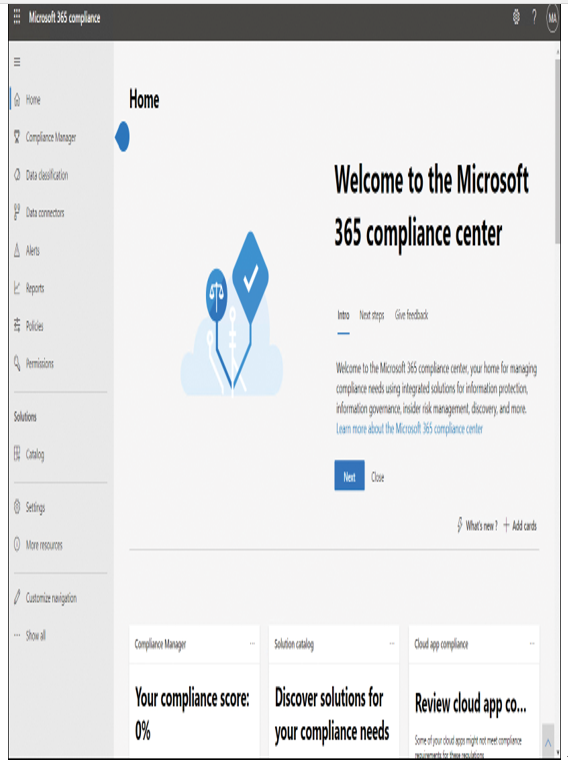
Figure 4-47 The Microsoft 365 Compliance Center home page
- On the Microsoft 365 compliance page, in the navigation pane, select Data loss prevention.
- In the details pane, select the Policies tab. A new tab opens.
- In the details pane, select +Create policy.
- Under the Start with a template or create a custom policy heading, choose one of the DLP policy templates. For this example, we will select a Privacy template covering U.S. Personally Identifiable Information (PII) Data, as displayed in Figure 4-48, and then select Next.
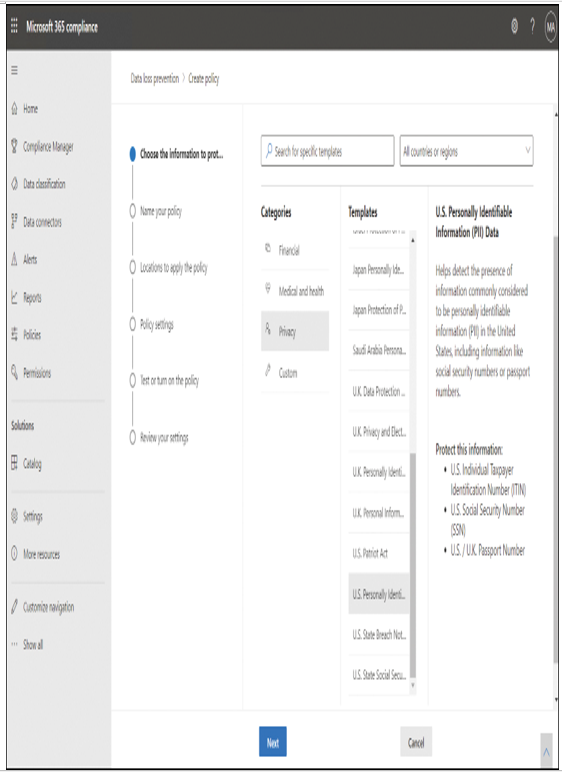
Figure 4-48 Creating a DLP policy
- Enter a name and description for the policy and select Next.
- Choose the locations that you want the DLP policy to protect, as displayed in Figure 4-49. Then select Next.
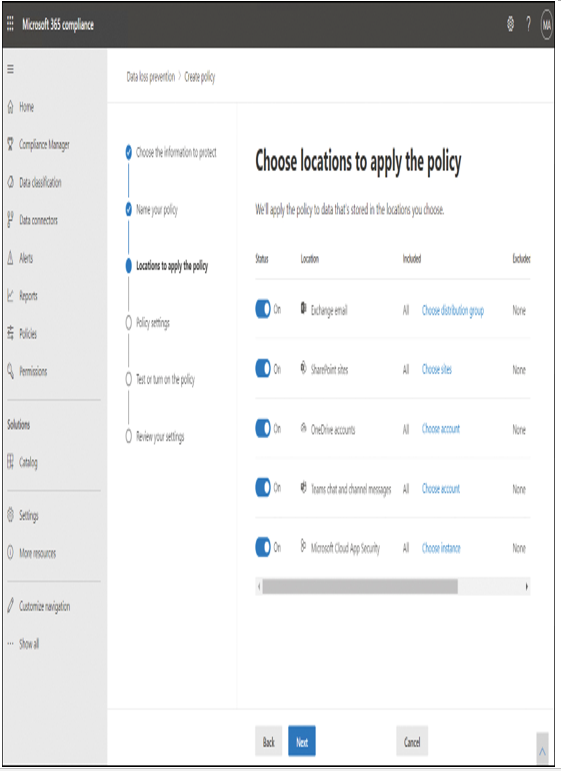
Figure 4-49 Defining data locations for protection with a DLP policy
9. On the Define policy settings page, displayed in Figure 4-50, you can select to review and customize the default settings or to create advanced DLP rules. Select Next.
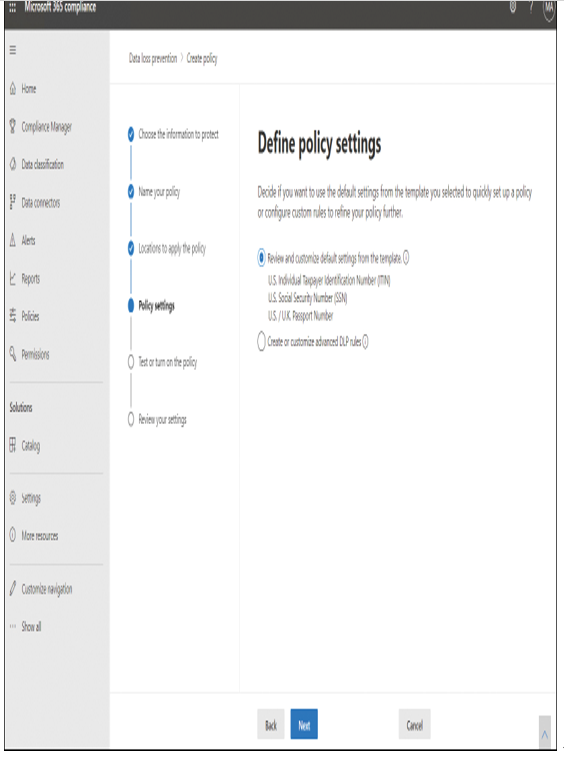
Figure 4-50 Customizing the content type for DLP protection
10. On the Info to protect page, displayed in Figure 4-51, select the Edit link to choose the types of content you want to protect. For example, you can identify the types of data and the number of instances of data the policy should react to.
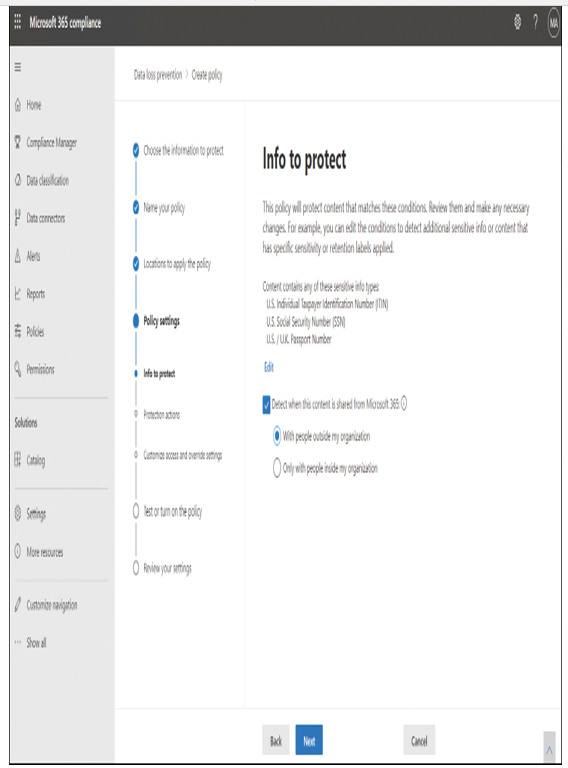
Figure 4-51 Specifying what sensitive data should be protected with a DLP protection policy
- Choose whether to detect if and how content is shared:
• With people outside my organization
• Only with people inside my organization - Select Next, and on the Protection Actions page, displayed in Figure 4-52, configure the following options:
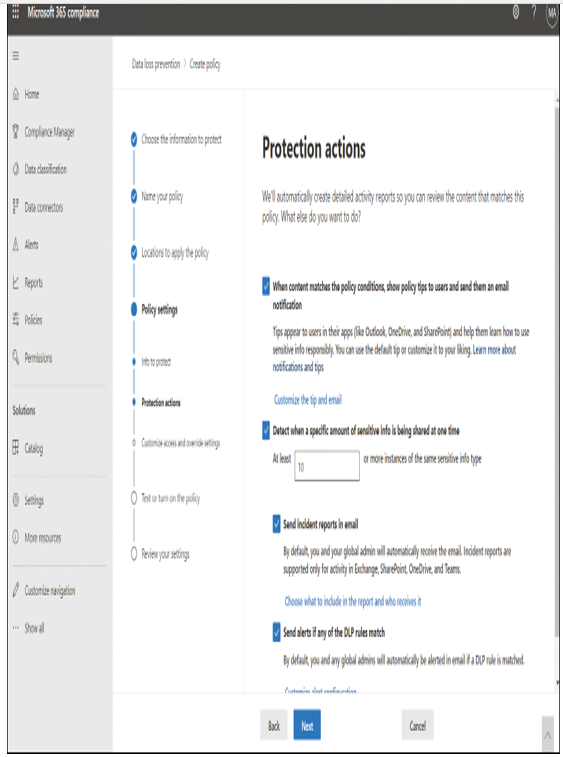
Figure 4-52 Defining protection actions for a DLP policy
• When content matches the policy conditions, show policy tips to users and send them an email notification. You can also customize the tip and email message.
• Detect when a specific amount of sensitive info is being shared at one time. Defaults to 10 instances.
• Send incident reports in email.
• Send alerts if any of the DLP rules match.
• Restrict access or encrypt the content in Microsoft 365 locations.
- By default, users are blocked from sending email and Teams chats and channel messages that contain the type of content you’re protecting. On the Customize access and override settings page, you can choose who has access to shared SharePoint and OneDrive files. You can also decide if you want to let people override the policy’s restrictions. Select Next.
- On the Test or turn on the policy page, there are three options:
• I’d like to test it out first (Show policy tips while in test mode)
• Yes, turn it on right away
• No, keep it off. I’ll turn it on later - Select the appropriate option and select Next.
- Review your settings for this policy and select Submit.
- It might take a moment until the policy is created. Then select Done.
Depending on the size of your organization, you should consider rolling your DLP policies out gradually to assess their impact and test their effectiveness. A DLP policy could unintentionally block access to documents that staff require for their daily work. It is therefore recommended that you pilot the deployment of DLP policies and initially limit the location and scope.
Once the initial test deployment is successful, you can roll the DLP policies out to a wider audience. Throughout the process, you should monitor the DLP reports, incident reports, and any notifications to make sure that the results are what you intend.


